|
|
|
|
Wave3D (Spiral) for AC3DReleased under the GNU LESSER GENERAL PUBLIC LICENSE. Download Windows version 1.0 * NOTE: The RedHat version contains all source code as well as its own README. This plugin was created by Eldon Brown using the source code for the Wave plugin. This plugin actually offers a super-set of the features from the Wave plugin, but the original Wave plugin remains available as a simpler utility.
Wave3D transforms the selected vertices using an axis-aligned waveform. Similar to the Wave plugin, but Amplitude is applied to two axes at once, and there is also a setting for amplitude decay. Using this plugin, creating spirals in AC3D is simple. This plugin and code are freely distributable AC3D versions prior to version 6have not been tested with this script. InstallationCopy the wave3d.tcl and wave3d.p files to your AC3D plugins folder (for example, if using Windows, C:\Program Files\AC3D5\plugin) and (re)start AC3D. You will find the "Wave3D..." menu item under the "Tools" menu.
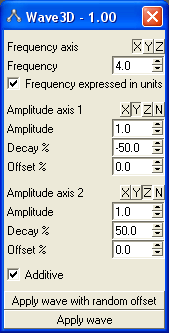
DescriptionWave3D is based on the Wave AC3D plugin. Please refer to that plugin's page for the basics of creating Waves. The interface options are similar to Wave's, but a couple of new features have been added.
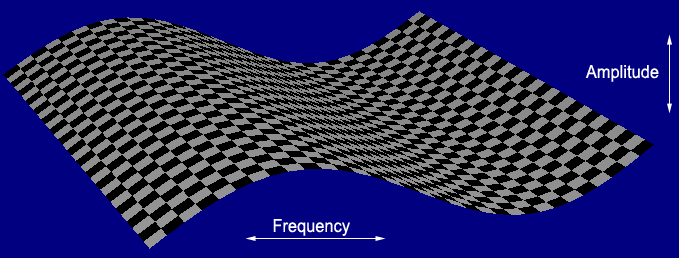
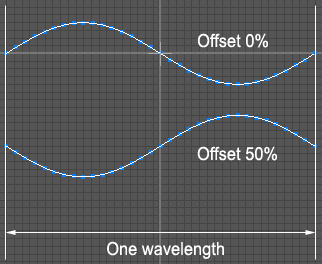
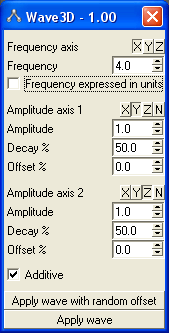
Frequency, amplitude, and offset
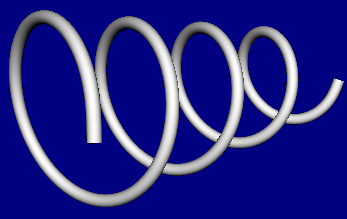
ExamplesExample : Creating a spiral springWe'll create this spring in this example.
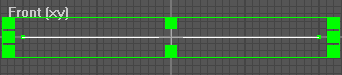
First, create a horizontal line with only two points in the Front (XY) view. Make the line four units wide.
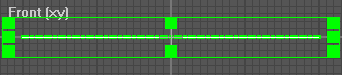
Next, with the line selected, press Ctrl+Shift+I (or in the menu use "Vertex->Insert Vertex") a total of six times. You should have a line like the one below.
Select the "Wave3D..." menu item under the "Tools" menu. This brings up the Wave interface. Set the following options:
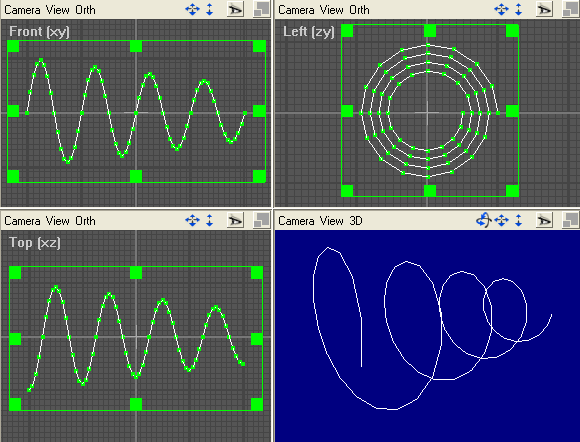
Clicking Apply wave at this point should give you the following shape.
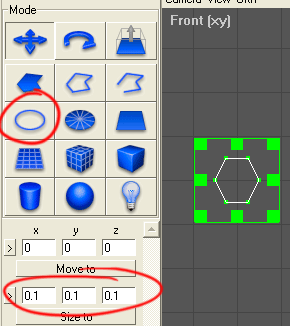
Create an Ellipse in any view. You will get a circular outline from this. I set my ellipse to have only 6 sides (we will be subdividing the shape to smooth it out). In the "Size to" dialog, set the size of the ellipse to 0.1x 0.1y 0.1z and click the Size To button.
With the ellipse still selected, Shift+click the spiral we just made, then perform an Object -> Extrude along path.
|
| All content Copyright © 2006 Dennis Hawthorne, except where explicitly noted supercoldmilk © 2006 Dennis Hawthorne |
||