Creating Animated Objects for X-Plane with AC3D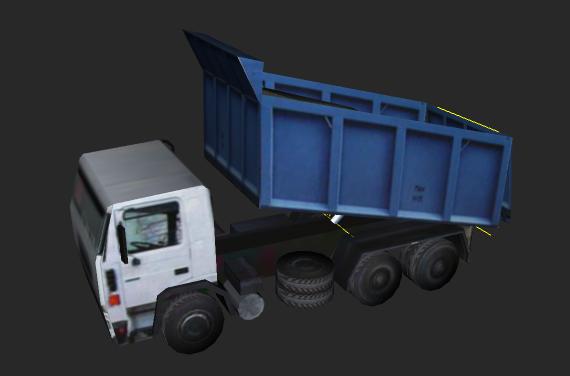
The purpose of this small tutorial is to show how to use the animation features of the AC3D plugin for X-Plane. First check that you have the AC3D plugin installed. After installation, you will see a new menu "X-Plane" has been added to the right of the main menu bar in AC3D. 
If you need to install the plugin, you can get it from http://www.inivis.com/forum/showthread.php?t=7032 (instructions to install it are also there) You may also want to download the latest DataRefs.txt from the Xsquawkbox site and drop it into the AC3D plugin folder too in order to let the plugin permit you to select the datarefs you may need: http://www.xsquawkbox.net/xpsdk/docs/DataRefs.txtlocal copy on www.inivis.com (may be outdated) We are now ready to use AC3D with X-Plane files, let's examine the 3 cases in which we may step:
Animated files already in .OBJ format.There's absolutely no need to make any action to update animated objects which are in .OBJ format. The plugin is able to read the animations stored in those files and to show them properly, preserving perfect compatibility. Once the .OBJ file is open, it's animations can be directly viewed in AC3D by selecting 'Animation Time...' from the "X-plane" top menu: 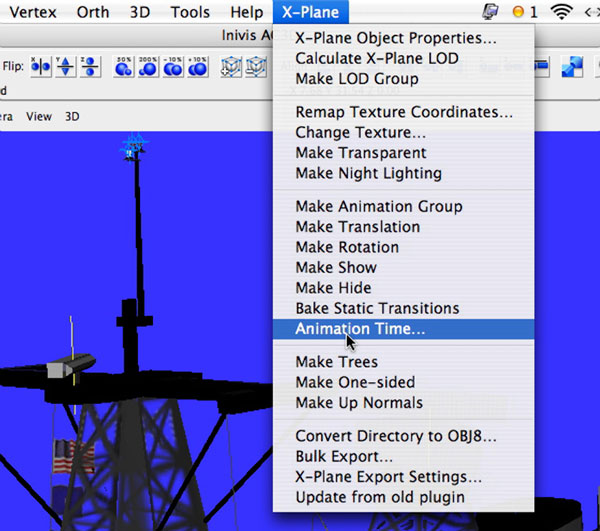
One way you can tell that the animations have been imported is: AC3D represents the axis for rotation or path for translation as yellow lines. In the picture above, we can see the yellow line going through the radar dish on the mast of the nimitz. This shows that the radar rotates around the vertical axis. The X-Plane Animation Window shows up and animations can be examined by moving the cursors in it, one cursor for each used dataref. We can re-export to .OBJ format in the same way, of course, and the object will still work properly in X-Plane. Animated files in .ac format.The most "complex" case is the handling of previously released animations stored into AC3D .ac files, our master files, for instance. THIS STEP IS ONLY NECESSARY WITH OLD AC3D FILES MADE USING EARLY VERSIONS OF THE PLUGIN.
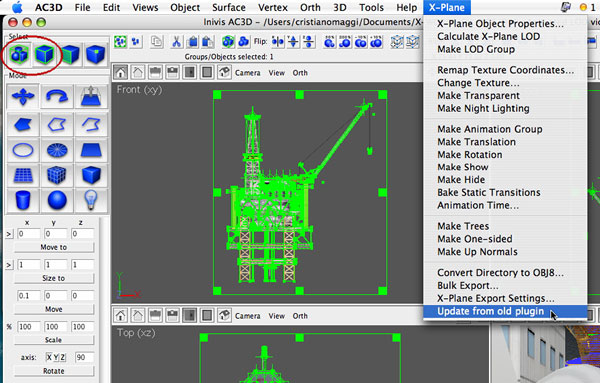
All the animations are magically updated and can then be checked in the same way we already learned in the previous section. We are now able to re-save our file to keep an up-to-date version of our master work for reference, modify it, and export it as an X-Plane .OBJ file as usual. (You will also know that your update has succeeded because you will see yellow animation lines for all of the rotations and translations in the model.) 3. Animating a new file.Let's now consider the most intriguing section of this tutorial: how to make animations from scratch, and examining the new related capabilities of the AC3D X-Plane plugin. We need a model, of course, let's take this dump truck as example. (You can download the .ac file from here:) TRUCK.zipIn this model we need to set some animations: the dump bin must raise, it's door must open together with this movement to release the dump, the piston under the container must extent following those movements pretending it's the "engine" of the raising movement. It's fundamental that our model is well organized in its internal structure before starting the animation procedure; we need the help of the hierarchy (Tools/Hierarchy View) to group various objects so that everything could properly work. In my model I've separated the objects that will remain still from the objects that need to be animated in order to avoid confusion, remember you can always make visible or invisible any single object by clicking on its eye-shaped icon in the hierarchy. 
First of all I need to make the bin raise (together with the dump) rotating by a hinge placed near the back of the truck and this rotation should make the door open in order to pretend that the dump could drop. This first animation is then the result of a nesting of 2 separated movements, 2 separated rotations. The bin raising must involve the door opening, so let's select 3 objects: "Container" + "Door", the items that will animate, and "Gravel", which is the contained dump that needs to move together with the bin. Now go in the X-Plane menu and select "Make Animation Group" to create a special group, needed for animations purposes. 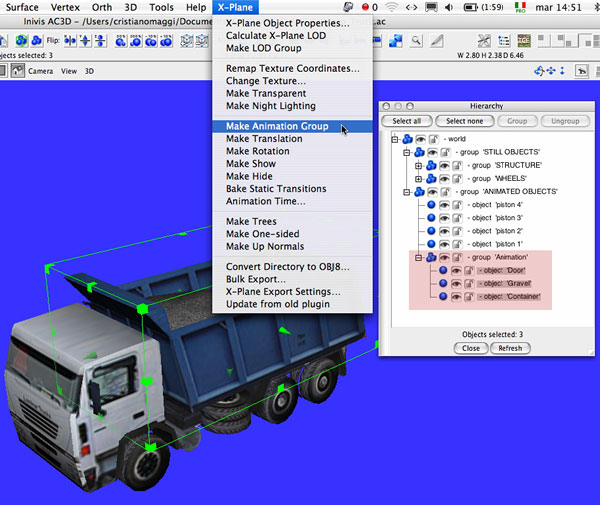
Let's now set the first rotation by selecting "Make Rotation" , from the X-plane menu again. A yellow vertical line appears, that's the axis of our rotation, but it's set vertical and it's placed in the origin so we need to move and position it correctly. No need for calculations, we can just simply control it as any AC3D line and place it in the position where the hinge is needed. 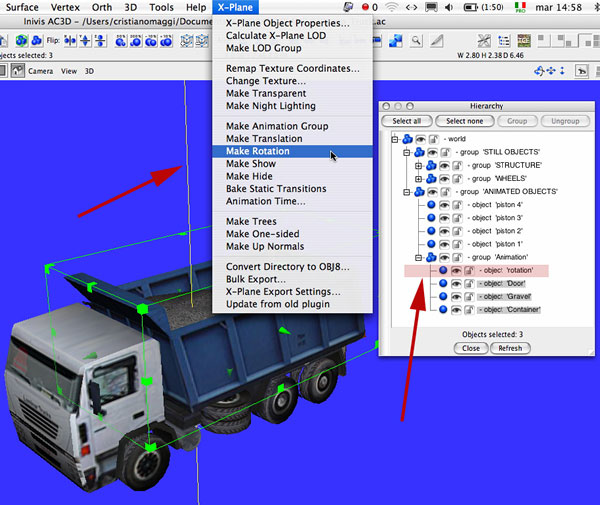
It's really matter of seconds to place the axis where we need it, notice that for AC3D the axis is a normal object, in the hierarchy, we can select it, hide it, but better leave its name as the default given "rotation" in order to immediately understand what it is inside the structure of our model. 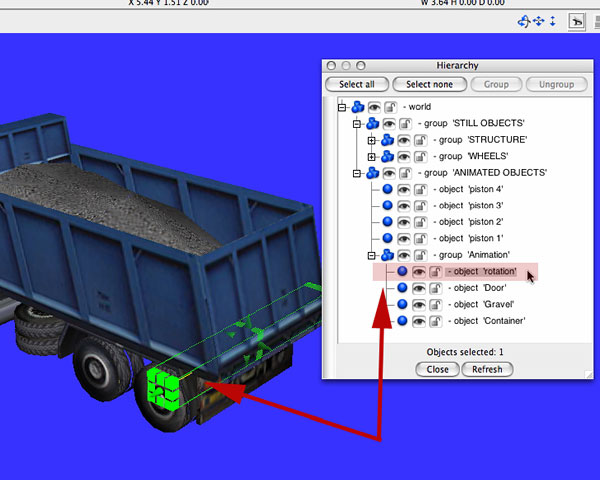
To bring the animation to life we need now to choose "X-Plane Object Properties", the very first item of the X-Plane menu. In the pop up window that will appear we can enter all the values of our rotation and select the dataref that will cause the movement. I have chosen the dataref which animates the oil rigs' cranes in order to have a cyclic up and down of the bin, this dataref needs to put "-1" and "1" in the leftmost fields and then the angle, in degrees, between minimum and maximum excursion, in the other two fields. I have entered from "0" to "40". 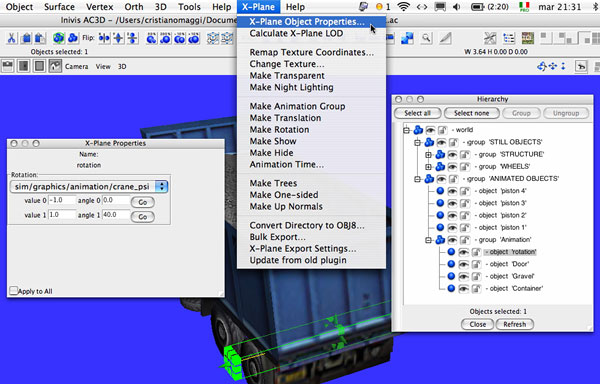
We can now even check our first movement better by invoking the "Animation Time" item from the X-Plane menu, as already explained in the first section of the tutorial. The bin will show itself in the middle of the excursion due to the caracteristics of this peculiar dataref, a cyclic dataref, intended to make the movement endless. We must then make the door open when the bin raises; this second movement should be synchronized with the first one. To do that we must nest the second movement into the first by creating another "Animation Group" in the same way we created the first, but selecting the "Door" object only. We will then set the proper rotation axis exactly in the same way we just did for the bin and the proper rotation values in the "X-Plane Properties" window. The hierarchy always helps us checking that our nesting is correct in order to end with a perfect union of the two animations. As usual, the "Animation Time" window will permit us to check if everything is well done. 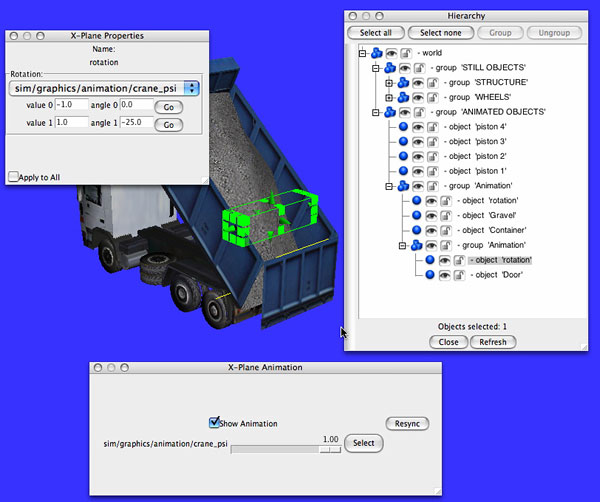 Adding another animation to the piston which must simulate to raise the container is then the last task; we will need to add a rotation to the piston base together with multiple translations for the segments of the telescopic part of it, all the translations will need to be nested into the first rotating part, of course. 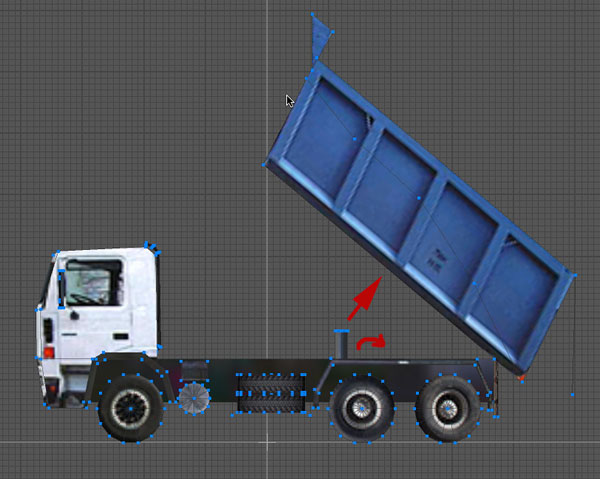
Let-s start from the translations, one for each segment of the piston. We will then add the rotation for the whole group at the end. It's simple as setting rotations, after making the "Animation Groups" we only need to pick "Make Translation" from the X-Plane menu. Translations are represented by yellow lines identical to the rotation ones, so it's very simple to drag them around, rotate them and position them where they are needed. The only difference is that the length of the line represents the distance of the translation, very simple. Pay attention, though, when you scale the line, do not shorten them by both sides, shorten them only by the farmost side from the origin! The translation lines can be placed wherever you like, near the object that should translate is the better visual position to evaluate on-the-fly their lenght, though. In the following picture you can see that I put them side by side, near the segments that have to translate in order to better understand what they do. 
The object called "piston 1" will not translate, since it's the main socket fastened to the truck, all the other segments have their own "Animation Group" containing their proper translation, the longest way the segment need to travel, the longest translation line. To finish our model we must then make all these segments rotate together while they translate; to do this we will first make an "Animation Group" with the "piston 1" object only selected, assign a rotation to it in the way we already saw before for the truck bin: 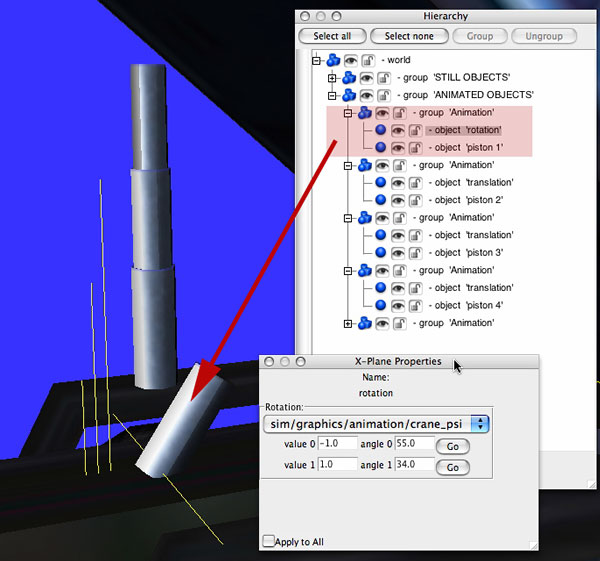
then, drag the other "Animation Groups" of the 3 piston sections into this main group using the hierarchy. Move then both the "piston 1" object and its rotation line to the top position of the group to let them "lead" the whole rotation. Invoking the "Animation Time" window will permit us to check that everything is correctly working in our model, which is ready for exporting into .OBJ for X-Plane. Original version by Cristiano Maggi |

